Sunday, September 9, 2012

Notes From Nikki-Runner Beans in Smoky Tomato Sauce over Creamy Polenta and Mock Apple Pie

Scarlet Runner Beans in Smoky Tomato Sauce over Creamy Polenta
I don't know about you, but I am blown away by the bounty of tomatoes in our Inverbrook share this year! My countertop has been stacked with these beautiful garden fruits for weeks and weeks now. And, of course, these aren't your run-of-the-mill, store-bought tomatoes. Each one is gorgeous and unique, and, more importantly, full of complex flavor and character. Even the paste tomatoes! Claire, you are a farming genius!

The following dish was inspired by two alluring ingredients, those handsome tomatoes, and a bag of delightfully giant scarlet runner beans I had stashed in my cabinet. Scarlet runners are a tad smoky by nature, so I decided to go with that and add a bit o' bacon to the tomato reduction. This is optional, of course. You could always smoke things up by using some smoked sea salt instead, or just enjoy the subtle smokiness that is inherent in the beans themselves. I added a bunch of torn kale leaves to the sauce, only because my body was craving greens. This is also optional.

As is true with all the recipes I write, there is a lot of wiggle room in here. Play around with it and make it your own. Taste and adjust, taste and adjust. You can also cut this recipe in half easily. As it stands now it will serve 6-8 very generously.

Enjoy!

Ingredients
10-12 medium-large tomatoes, roughly cored and chopped (I used mostly heirloom and slicing tomatoes, but a combo of whatever you have on hand is fine)

1 large yellow onion, chopped

3 large cloves of garlic, smashed and minced

4-6 oz bacon, finely chopped (substitute with a glug of extra virgin olive oil if omitting)

Three sprigs of fresh rosemary

Three sprigs of fresh oregano

1 bunch of kale, stemmed and torn into bite-sized pieces

Dash or two of red chili flakes (optional)

Sea salt

fresh ground pepper

Generous handful or two of fresh basil leaves

Approximately 4 C dried scarlet runner beans

6 C water

2 C polenta (corn grits)

3-4 T butter

A generous splash of milk

2 generous handfuls shredded Parmigiano Reggiano, plus more for topping

1. Cover the beans with water in a large pot and bring to a boil. Turn the heat down just a little so the beans are really cooking, but not vigorously boiling (somewhere between a simmer and a seriously rolling boil). Cover with a lid and let cook until tender. (Mine took an hour because I didn't pre-soak. If you pre-soak for at least an hour, you should be able to cut at least 20 minutes off that time.)

2. While the beans are cooking, in a large, deep skillet, saute the bacon, onions, and garlic over medium heat until the onions begin to caramelize and the bacon starts to crisp up a bit.

3. Stir in the tomatoes and turn up the heat, bringing the mixture to a simmer.

4. Add in the rosemary and oregano sprigs (leave them whole as you will later fish out the stems).

5. Season with sea salt, pepper, and red chili flakes.

6. Allow the mixture to lightly simmer uncovered while the beans continue to cook. The sauce will thicken as it simmers.

7. Once the beans are finished cooking, drain them in a colander and set them aside briefly while you fish the oregano and rosemary stems out of the sauce and stir in the kale.

8. Once all the kale is wilted, turn off the heat and add the basil and beans to the sauce. Mix it all together, cover, and set aside. It will stay nice and hot while you quickly make the polenta.

9. Bring 6 C of water to boil in a medium sauce pan. Add a few pinches of salt, and stir in the polenta.

10. Turn the heat down so the mixture is simmering, and stir occasionally for about five minutes. The mixture should quickly become the consistency of oatmeal. The longer you cook it, the thicker it will get.

11. Turn off the heat and stir in the butter, parm, milk, and some sea salt and pepper. Taste and adjust.

12. Serve the beans atop a large spoonful or two of polenta, and top with shredded parm and some more fresh ground pepper and/or red chili flakes.
 

 Mock Apple Pie

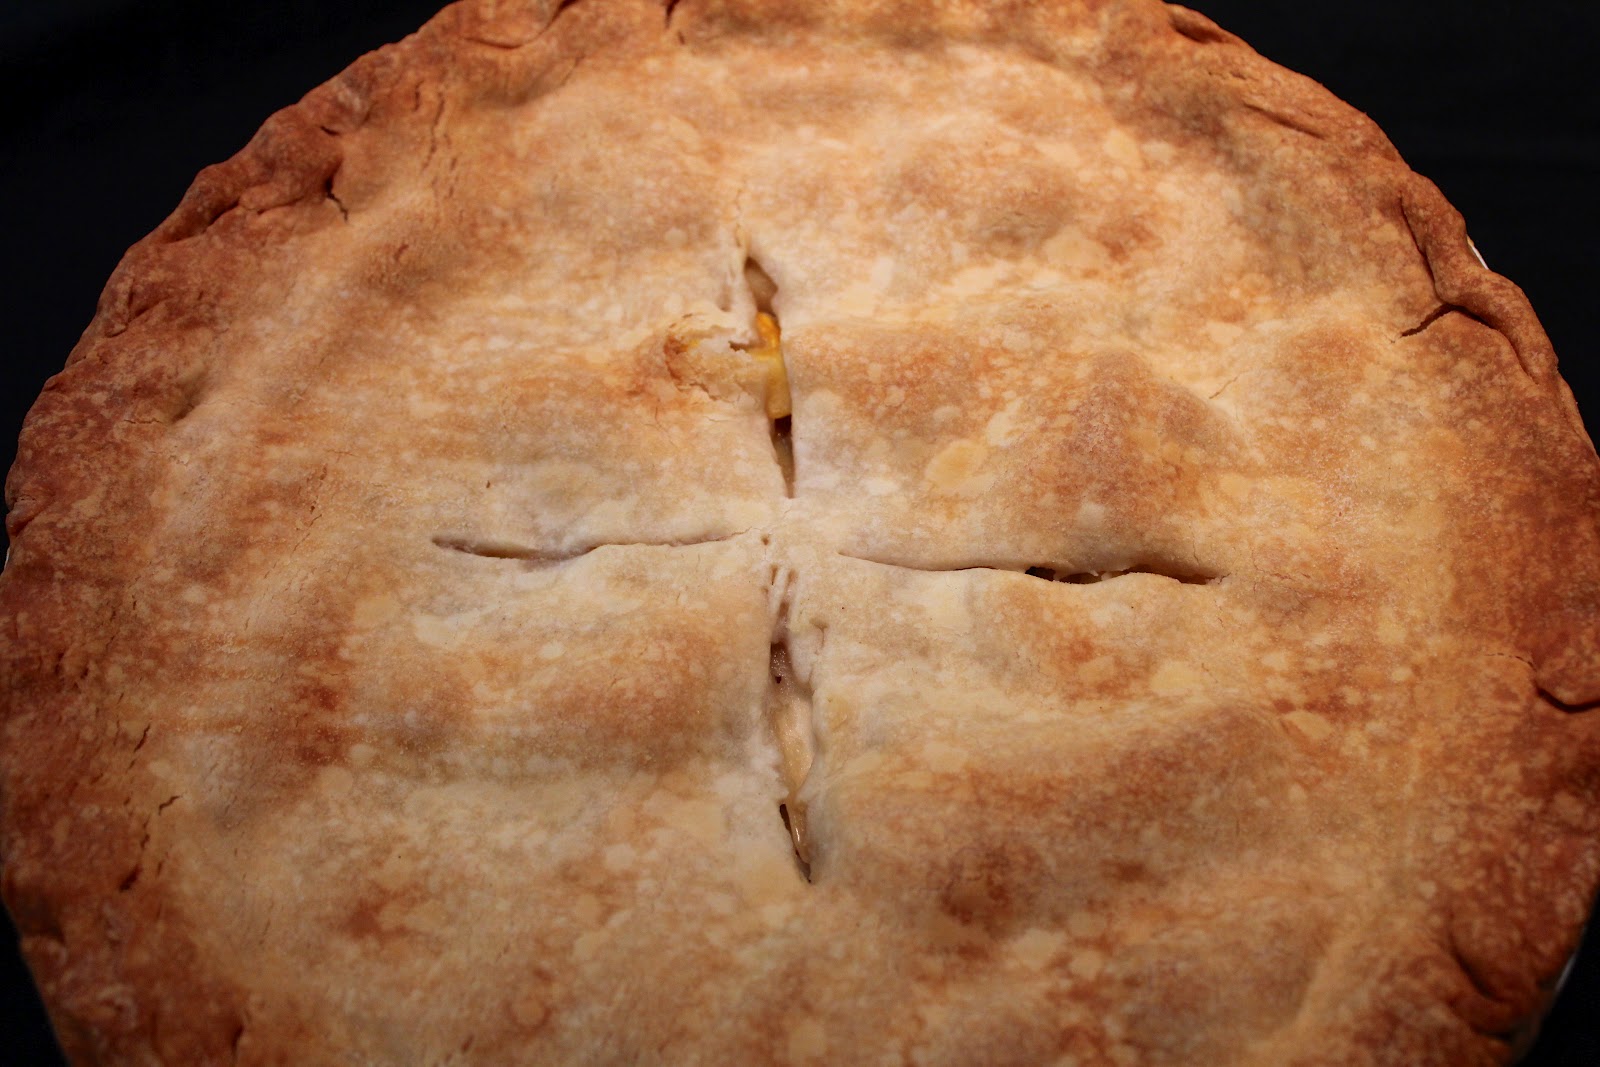
A friend of mine recently told me that I could make an "apple" pie using zucchini (no apple) and that it would taste just like an apple pie, possibly better. Truth be told, I was only mildly intrigued (more humoring, really). He was pretty convincing in his argument though (he's also a lawyer ;-)), so I thought I'd give it a try one night when I was wondering what to do with the stash of patty pan squash I had accumulated in my crisper from our Inverbrook share. Honestly, I was pretty surprised at how good it turned out. I thought it would be mushy and watery, it wasn't at all. I thought it would lack complexity of flavor, it didn't. I brought it to a Labor Day Weekend potluck, and folks raved about it. You've really gotta give it a try! Yet another outlet for the ever proliferous summer squash. I hope you enjoy it as much as we did!
Ingredients
Approximately 6 C roughly peeled, seeded (scoop out the seeds and the softer meat that surrounds them), chopped or sliced summer squash (I used patty pan, but any variety will do), par boiled and drained really well

1/2-3/4 C sugar (I used 1/2 C. Many recipes call for 1 whole C, but I don't like things super sweet.)

1/4 C brown sugar

1 tsp cinnamon

1/4 tsp nutmeg

1/4 tsp cardamom (allspice works too, although I like cardamom for it's brightness)

1 1/2 tsp cream of tartar

4 T all-purpose flour

pinch of salt

Generous squeeze of lemon

2 prepared piecrust doughs (one for the bottom and one for the top, store bought is fine), rolled out and ready to go

1. Preheat the oven to 350.
2. Toss the drained squash, sugars, cinnamon, nutmeg, cardamom, cream of tartar, flour, salt, and lemon together until well combined. The mixture will be a bit watery/juicy. That's okay. The cream of tartar and flour will take care of that as it cooks. Chemistry. ;-)
3. Line a fairly deep, 9" pie pan with one of the pie crusts doughs.
4. Fill the pan with the summer squash filling.
5. Top the pie with the other pie crust dough, fluting the edges with the bottom crust so they stick together.
6. Make 3-4 slits in the top crust.
7. Place the pie pan on a baking sheet (just in case it leaks), and cook in the oven until the top is brown and the filling is nice and bubbly (about 30-40 minutes).
8. If the edges of the pie start to get too brown, cover them with foil (I had to do this).
9. Allow the pie to cool, and then dig in.
Monday, September 3, 2012

This Week's Share-Green Beans


Happy Labor Day, Happy September. The new month ushers in a new crop of delicious green beans. Durning the hot dry summer it was hard to grow really good crisp and tender beans, however the recent rains have changed all that. You will have a choice between provider (pictured above), the very beany flat roma beans, and the crips tiny haricot vert or fillet beans. 

Along with beans this week's share includes more paste tomatoes, summer squash, cucumbers, peppers and Sun Jewel Asian (a.k.a yellow Korean) Melon.  This small yellow and white melon can be treated more like a cucumber than a melon.  See the links below for more information. Enjoy this week's share. 

Sun Jewel Asian Melon

Swordfish with Korean Melon, Cucumber, and Heirloom Tomato Relish

Eating Well Green Bean Recipes

Monday, August 20, 2012

Notes From Nikki-Tomato Soup and Haricot Vert in Heirloom Tomato Reduction

Roasted Tomato Soup with Farmhouse Cheddar Toasts
I put all those tomatoes from this week's share to good use in this delightfully tomato-centric dish that features oven-roasted tomatoes, fresh rosemary, local honey, and farmhouse cheddar cheese toasts. So good! This recipe can easily be halved. Our family of six had just a small amount leftover though, and it saves quite well. You can even freeze it. We used two whole loaves of La Brea organic wheat bread and 2 little blocks (4-6 oz each) of imported English farmhouse cheddar for the toasts. You could easily have enough toasts using half that amount (as indicated in the recipe), but I knew my family would want extra. :-) I hope you enjoy it as much as we did!
Ingredients
12-18 tomatoes (depending on size), lightly cored (just the tippy top) and halved (I used a variety of heirlooms, paste, and slicing... see photo below)

4 sprigs of rosemary, stemmed

2-3 T local honey

3-4 T extra virgin olive oil

1-2 T balsamic vinegar

2-3 T butter

1 large yellow onion, chopped

3-4 garlic cloves, smashed and minced

4-6 C stock (I used homemade chicken, vegetable would work too.. go for something mild though that won't take away from the roasted tomato flavor)

Sea salt

Fresh ground pepper

Generous splash or two of half and half or cream

1-2 whole loaves fresh bread, sliced fairly thin, slices halved

6-12 oz farmhouse cheddar, thinly sliced or shaved

1. Preheat the oven to 400.
2. Place the tomatoes, cut side up, in 2 baking dishes and drizzle with the olive oil, balsamic, and honey. Sprinkle the rosemary leaves over top (save a bit for garnish).
3. Roast the tomatoes until they start to brown on top and are about to fall apart (20-30 minutes).
4. While the tomatoes are roasting, spread the bread slices out onto baking sheets and top with the sliced/shaved cheddar. Set aside.
5. Saute the onion and garlic in the butter over medium heat in a large soup pot until the onions are soft and just starting to caramelize. If they finish before the tomatoes are done roasting, kill the heat.
6. Once the tomatoes are done, add them along with their accumulated juices to the pot with the onions and garlic. Turn the heat down in the oven to 375 and put the bread and cheese in, toasting until crispy and golden (5-7 minutes, tops).
7. Add the stock to the pot (start with 4 C and add more later if you want a thinner soup), and toss in some sea salt and pepper. Give the lot a good stir.
8. If you haven't turned off the heat already, do so now, and use an immersion blender to puree the mixture until smooth.
9. Add in the half and half.
10. Taste and adjust the seasoning.
11. Serve topped with a floating toast, a few rosemary leaves, and a bit of fresh ground pepper.


Roasted Haricot Verts in a Velvety Heirloom Tomato Reduction
As fancy as the title sounds, this recipe is really quite simple. It's basically roasted green beans in tomato sauce. I labeled it a reduction as opposed to a sauce because I allowed it to simmer a bit longer than usual so that it thickened up nicely and clung to the beans. The butter in the sauce helps to make it all velvety and smooth. You can use olive oil instead, but I don't recommend it. If you want to make it truly posh, you'll need to blanch and peel the tomatoes first (or fish the skins out of the finished sauce, an arduous task at best :-}). I did not do this. I happen to like tomato skins, and tend to make all of my dishes more "rustic" by leaving the skins on just about everything (sans bananas and oranges ;-)).
The girls in our family topped our servings with local Highland Farm's sheep feta (available in the Inverbrook Distribution Shed fridge), but the boys topped theirs with shaved Parmigiano-Reggiano. Either way, it's quite delicious, if I do say so myself.
Enjoy!

Ingredients
1 lb haricot verts, stemmed

Glug of extra virgin olive oil

2 T + 1 T butter

1 large-ish yellow onion, thinly sliced (shallots would be lovely here too)

5-6 cloves of garlic, smashed and minced

Generous splash of white wine (I used Pinot Grigio)

3-4 C cored and chopped heirloom tomatoes

Sea salt

Fresh ground pepper

Pinch or two of red pepper flakes (optional)

Handful of lemon basil leaves, torn (you can also use regular basil and add a splash of lemon juice and a bit of zest)

Feta or Parm for topping

1. Preheat the oven to 400.
2. Drizzle the olive oil over a roasting pan and spread the green beans evenly over top. Season with a bit of sea salt and pepper.
3. Shake the pan so that the oil coats it somewhat evenly, and roast the beans until firm tender.
4. While the beans are roasting, saute the onions and garlic in 2 T of butter over medium heat until the onions start to caramelize.
5. Add in a generous splash of white wine and simmer for a few minutes until it is significantly reduced.
6. Add the tomatoes, along with some sea salt, pepper, and red pepper flakes, and simmer uncovered until the tomatoes break down and the sauce thickens to your liking.
7. Add in the other T of butter and stir until smooth and velvety.
8. Taste and adjust the seasoning.
9. Turn off the heat and stir in the lemon basil and the roasted beans.
10. Serve topped with crumbled feta or shaved or shredded parmesan.
Serves 6

Monday, August 13, 2012

This Week's Share--Tomatoes, Tomatoes and Tomatoes....

This week's share is just full of tomatoes--salad, paste, cherry, slicing and lots of colorful heirlooms.  It has been a while since we have had a really good tomato year, so I hope you all can enjoy the bounty.  Along with tomatoes, this week's share will also include sweet peppers, summer squash, eggplant and a few other items.  Next week the potatoes will return and the share will be slightly more diverse.  In the meantime we can celebrate that quintessential summer garden vegetable(fruit)--the amazing tomato.

Below are a bunch of links related to fully enjoying your tomato filled share:

-Tomatoes the Resilient Fruit from Food52

-Food52 8 Summery Tomato recipes

-Fine Cooking's Heirloom Tomato Guide

-Martha Stewart Tomato Recipes

Ratatouille Recipe/Video from Epicurious

Ratatouille's (from the movie) Ratatouille

Enjoy your tomatoes!

Sunday, August 12, 2012

Notes From Nikki-Spanish Roasted Potatoes in Heirloom Tomato Sauce

Spanish Roasted Potatoes in Heirloom Tomato Sauce

The following dish is both sweet and smokey, bright and earthy; the sweetness coming from the Vidalia onion and heirloom tomatoes, the smokiness from the bacon and/or smoked paprika, the fresh herbs brightening the medley, and the potatoes and saffron bringing it all right back down to earth. A serious party in your mouth. Don't skimp on the paprika and saffron, and feel free to add more red pepper flakes for added heat... you could also substitute the flakes with a fresh chopped jalapeno or two. I served this with grilled lemon/rosemary chicken, and roasted local corn on the cob, a winning combo for sure. The recipe can easily be halved. Enjoy!

Ingredients

18 small-medium new potatoes, cut into bite-sized quarters or eighths (or sixteenths)
Glug of extra virgin olive oil
1 large Vidalia onion, chopped (any sweet yellow onion variety with do)
3-4 cloves of garlic, smashed and minced
1/4-1/2 lb of bacon, finely chopped (optional, but be sure to use smoked paprika and/or smoked sea salt if you decide to omit it)
6 large heirloom tomatoes, cored and chopped
A few sprigs of thyme, oregano, and/or rosemary, left whole (I used all three)
A generous pinch or two of saffron, crushed
Plenty of smoked paprika (you can use unsmoked sweet or hot paprika if you are using bacon)
Red pepper flakes to taste (you can also use hot paprika, and/or a fresh, chopped jalapeno pepper)
Sea salt
Fresh ground pepper (optional)
Sour cream for topping
Fresh parsley for garnishing

1. Preheat the oven to 400.
2. Drizzle olive oil over a roasting pan and spread the potatoes in a single layer over top. Season with sea salt, pepper (if using), and plenty of paprika. Give the pan a good shake to distribute the oil more evenly under the potatoes so they don't stick.
3. Put the potatoes in the oven and roast until tender and golden.
4. While the potatoes are roasting, cook the bacon over medium heat until the fat is rendered. Add in the onion, garlic, a generous dash or two (or three) of paprika, the saffron, a bit of sea salt, and the red pepper flakes (or jalapeno). Saute until the bacon crisps up a bit and the onions begin to caramelize.
5. Add in the tomatoes and the herbs.
6. Simmer uncovered until the tomatoes completely break down and the sauce thickens.
7. Once the potatoes are finished roasting, add them to the thickened tomato sauce, and taste and adjust the seasoning.
8. Fish out the herb stems and serve topped with a dollop of sour cream and a sprig of parsley.

Serves 6-8 as a side dish


Friday, August 3, 2012

Preserving the Summer Bounty-Food In Jars

The month of August (depending on the weather) often marks an incredibly bountiful time in our gardens and orchards.  The ancient Celts celebrated the this time of year with Lammas or Lughnasadh, also known as the "Feast of the First Fruits."  Here at the farm, the start of August marks the beginning of the delicious North Star Orchard Fruit CSA.  North Star is a staple at the West Chester Farmers Market and I highly recommend their delicious peaches, plums, apples and Asian pears (perhaps some FIG readers are already members and are now enjoy the first bag of delicious fruit).

As the tomatoes and peaches start piling up on our kitchen counters, I know many start contemplating ways to preserve these tastes of summer for the months ahead.  Food preservation can be a daunting task, especially when it comes to canning.  I used to shy away from canning especially when freezing was an option.  The glass, the hot water baths, and the potential for botulism all scared me.  That all changed when I discovered the informative and delicious Philly based food blog Food In Jars. Food in Jars is dedicated to the art of "putting up" food in jars, not all of it necessarily canned.  Blog creator Marisa McClellan often features granola, herb flavored salts, drink mixes, as well as frozen fruits,vegetables, stocks, etc...This concept of storing in glass has become doubling appealing as the dangers of plastic have started to emerge.   Check out this very timely post dedicated to preserving small tomatoes--as you can see the preservation techniques are quite varied--freezing, drying, roasting, canning and pickling.

In May of this year Marisa released her first book Food in Jars Preserving in Small Batches Year-Round. In June my sister ran into Marisa doing a demo and book signing at the Whole Foods in Philadelphia.  She brought the book back to the farm and immediately felt compelled to can something--beets where the produce of choice at that point.  Below are a series of photos from my sisters beet canning process (all photos by Hillary Murray).
The recipe of choice-Gingery Pickled Beets


Hot water bath, heating jars and lids

The ingredients of the Gingery Pickled Beet Recipe

The finished product
Marisa truly makes the art of food preservation easy.  All of her recipes are high-acid, thus eliminating the worry of botulism.  The great photos and step by step instructions takes the mystery out of canning. The recipe I am looking forward to trying is "Boozy Canned Peaches."  Marisa writes:  Canned peaches generally get a bad rap.  The ones you buy at the grocery store typically manage to be both flavorless and slightly metallic.  And often, home-canned peaches can look a little like a creature that has spent is life underwater.  The thing, is however homely, a ripe peach canned in a slightly sweet syrup is just wonderful, particularly in March or April, when stone fruit is sill months away.  Add a slug of bourbon to each jar and prepare to be transported.
So get yourself 6 pound of yellow peaches, 1 lemon, a little sugar, a bottle of bourbon and a copy of Food in Jars.  Happy canning. 

Wednesday, August 1, 2012

This Week's Share--More Tomatoes


This week's share ushers in the start of tomato season--slicing, heirloom, salad and cherry tomatoes will all be available this week.  Along with the tomatoes, expect summer squash, potatoes, cucumbers, eggplant and herbs.  Below are two links from 101 Cookbooks, enjoy your tomatoes.

-Cherry Tomatoes and Couscous

-Heirloom Tomato Salad